Getting started
Install the hypervisor, open XO Lite, and deploy XOA-hl to manage your virtual machines.
What is XCP-hl?
XCP-hl is a homelab distribution based on XCP-ng 8.3. It runs directly on your hardware and hosts your virtual machines. XO Lite is the small management interface served by the host. XOA-hl is a separate virtual machine running Xen Orchestra, the administration WebUI for your hosts and VMs.
XO Lite offers four appliance choices: XOA-hl (default), the official Vates appliance, Ronivay’s image, or a custom XVA image. This guide follows the XOA-hl path. See Features for the differences.
Before you begin
- Use a dedicated machine supported by XCP-ng 8.3, with hardware virtualization enabled. Check the upstream requirements for CPU, memory and network support.
- Back up any data on the disks you intend to use. Installation erases the selected disks.
- Allow at least 100 GB on the installation disk for XCP-hl’s automatic 20 GB ISO library, plus space for your VMs. Smaller supported disks use the upstream layout without this library. See ISO storage.
- Prepare a stable management IP address, gateway, DNS and NTP settings. A static address or DHCP reservation makes the host easier to find.
- Have a second computer with a browser and network access to the host. Appliance deployment also needs access to the chosen image URL.
Download & verify
Verify the ISO
Download the checksum and its signature from the same release, and use the project’s published public key linked below. Verify the key fingerprint before trusting it: 2F59 1DB9 D2C1 28C4 C3D9 63F4 6DA0 0DCA 5BBA 215A. The historical key name is XCP-ng Community Edition (Master signing key).
Checksum signature · Public signing key
gpg --import xcp-ng-ce-public.asc
gpg --fingerprint 2F591DB9D2C128C4C3D963F46DA00DCA5BBA215A
gpg --verify xcp-ng-8.3-ce50.iso.sha256.asc xcp-ng-8.3-ce50.iso.sha256
sha256sum -c xcp-ng-8.3-ce50.iso.sha256
Write the ISO to a USB drive using an image-writing tool, or attach it as virtual installation media. Writing the image erases the USB drive; check which device you selected.
Quick-start
1 · Install XCP-hl
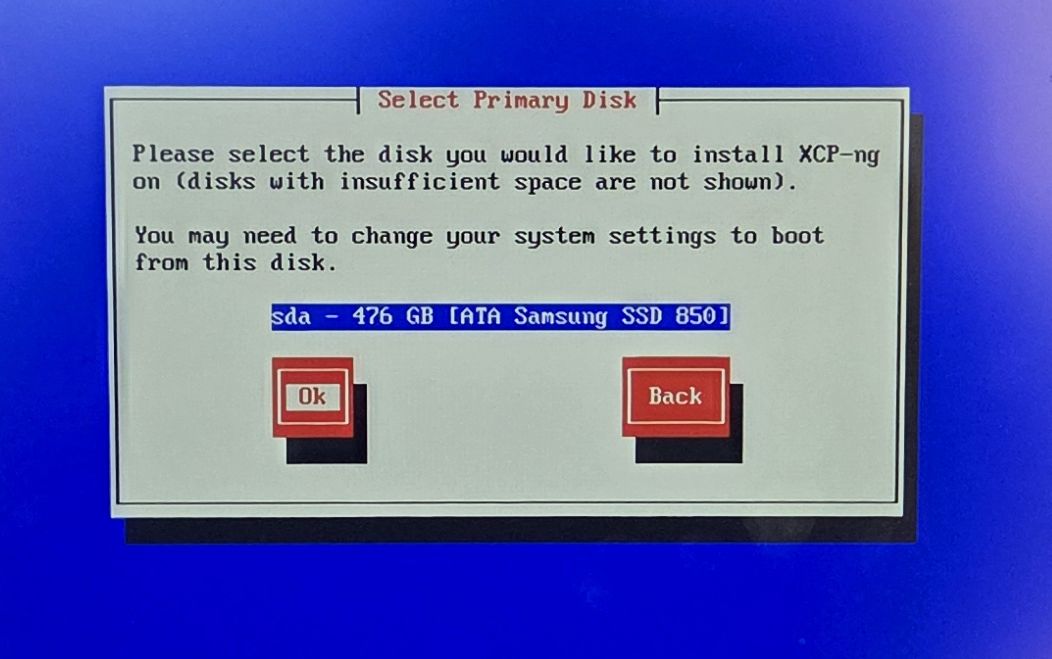
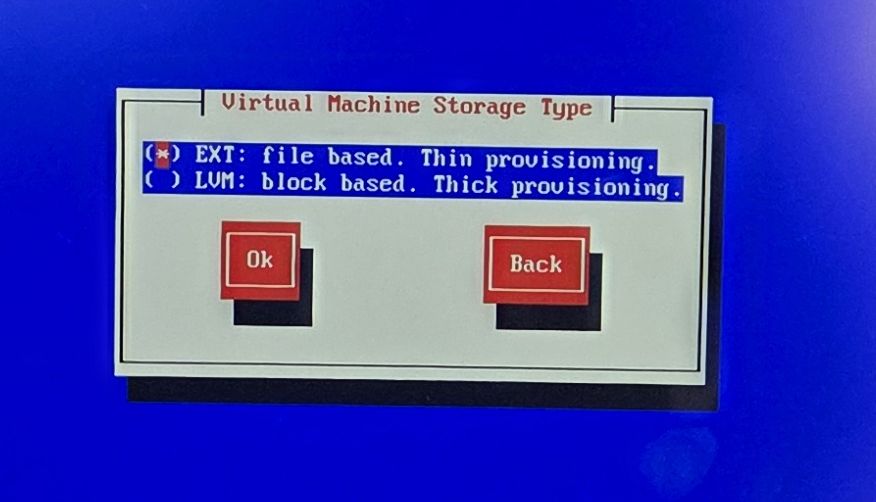
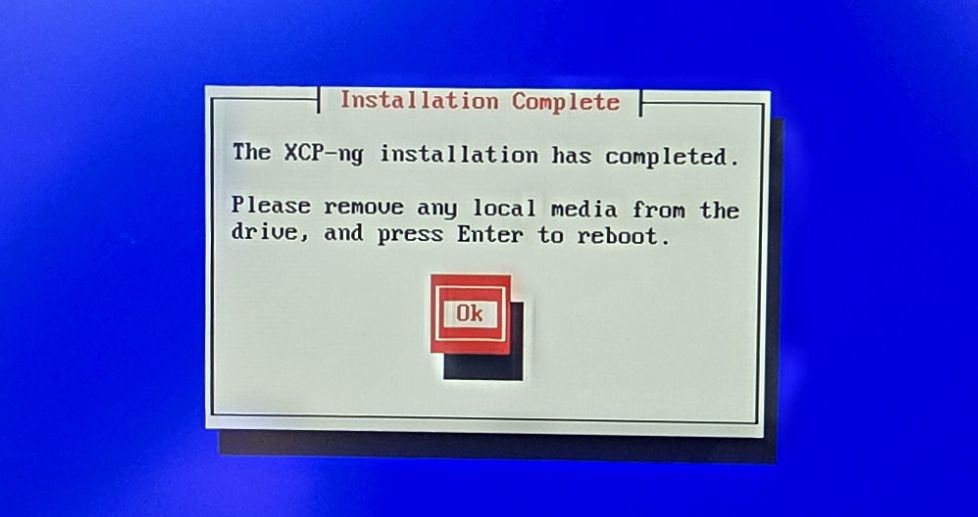
This is a good default for a single-host homelab, adapted from the author’s XCP-ng first-install walkthrough. Adjust disk, storage and network choices to your needs. The photographs below show upstream XCP-ng 8.3; labels can differ in XCP-hl. The upstream installation guide covers additional options.
Boot the installer and select your keyboard layout. Read the installation warning and license agreement before continuing.
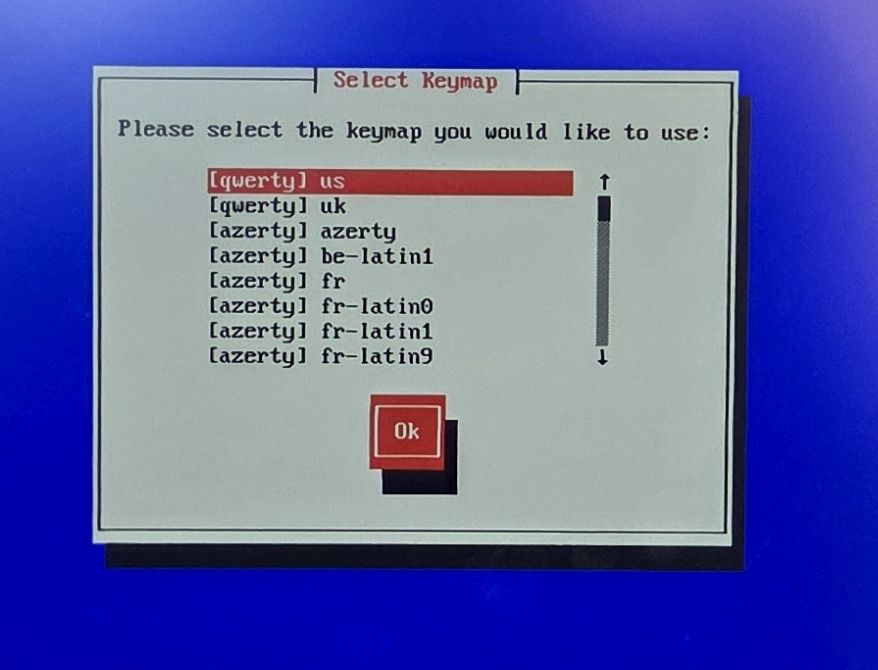
Select the system disk and the disk for VM storage. Check the device names and capacities. Do not select the USB installer or a disk whose data you want to keep.
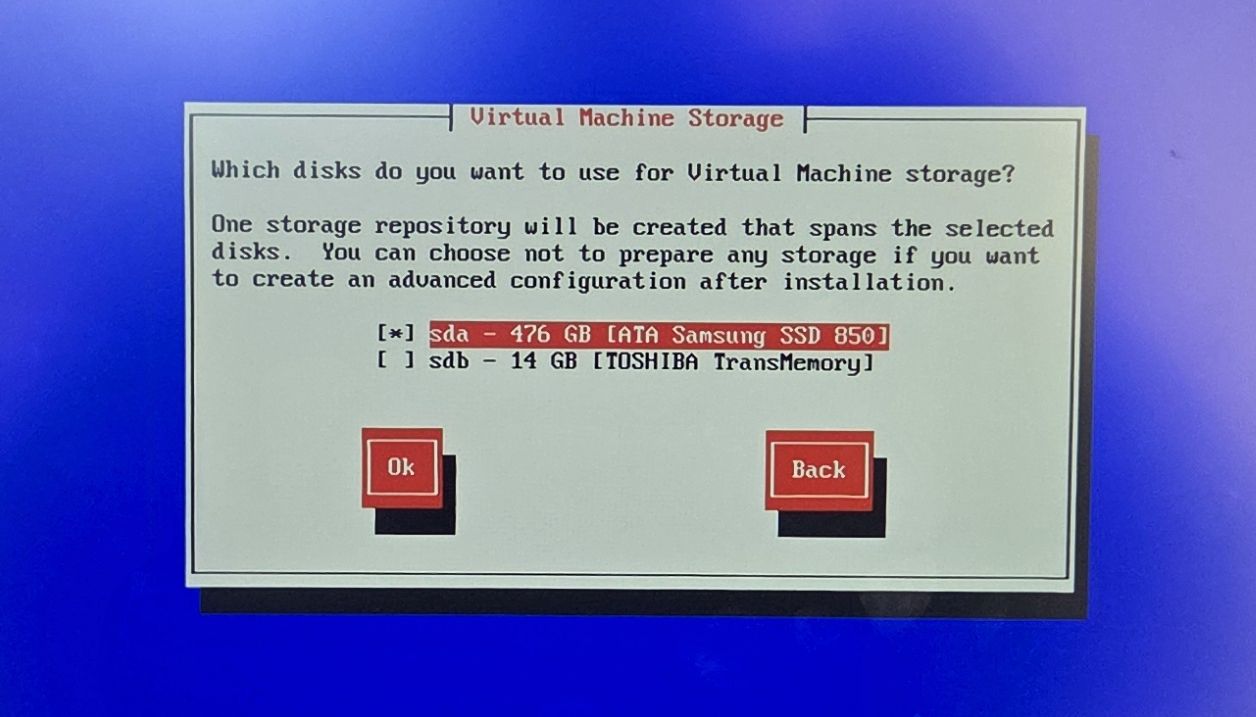
Choose the storage type. EXT thin provisioning is a practical starting point for a homelab: virtual disks consume space as data is written. LVM reserves their allocated capacity. Choose for your workloads and monitor free space with either option.
Use Local media as the installation source. Run the media verification when offered, particularly if you suspect a damaged download or USB drive.
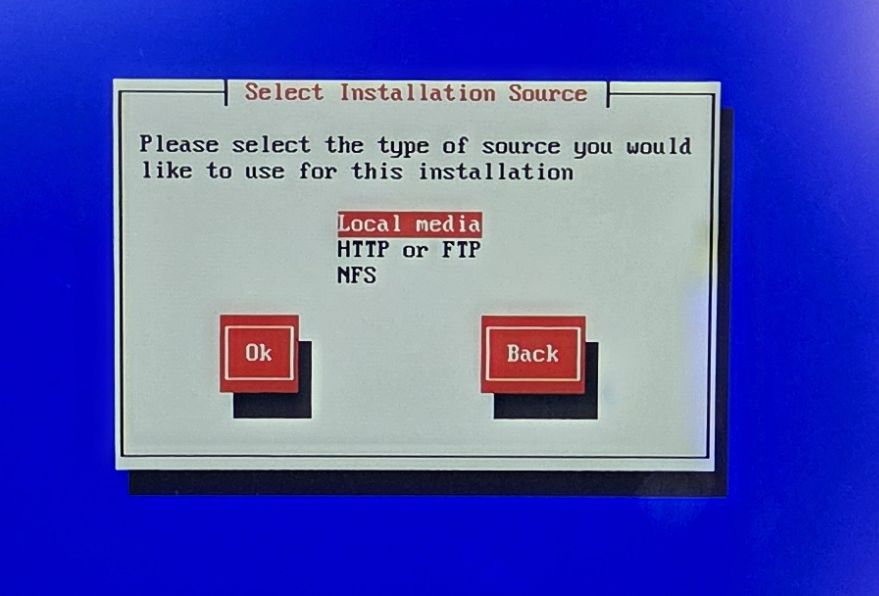
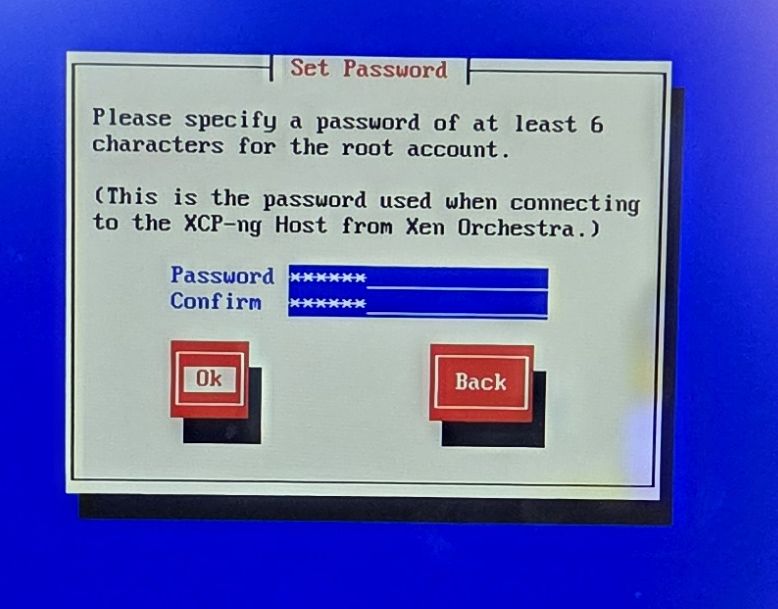
Set and store the root password. You will use this account to log in to XO Lite and connect the host to Xen Orchestra.
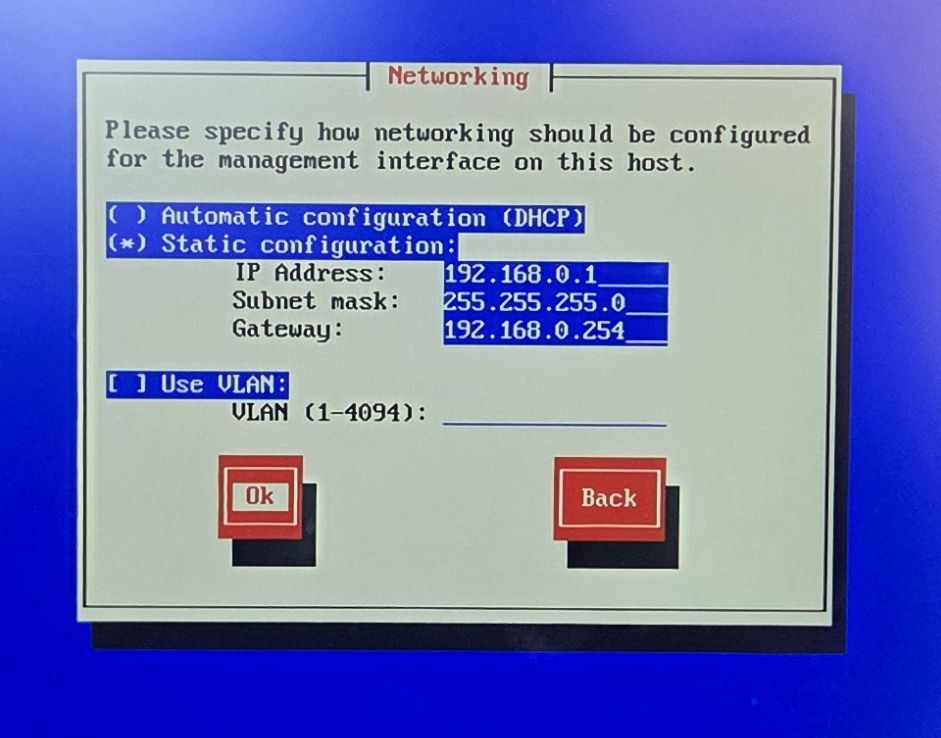
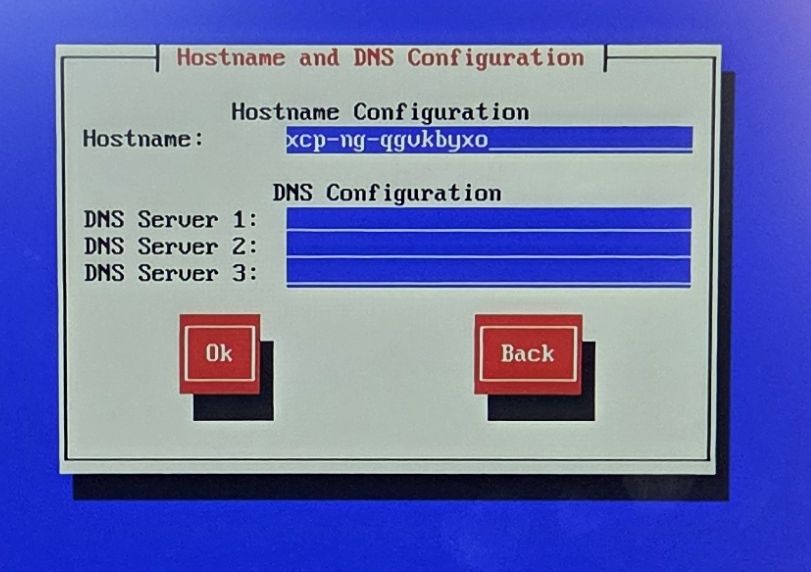
Configure management networking and DNS. Use a static address or DHCP reservation; configure a VLAN only if your network requires it. Enter the hostname and reachable DNS servers.
Set the timezone and NTP servers, then review the installation. Use an internal NTP server if the host cannot reach public servers. Confirm the selected disks before starting the installation.
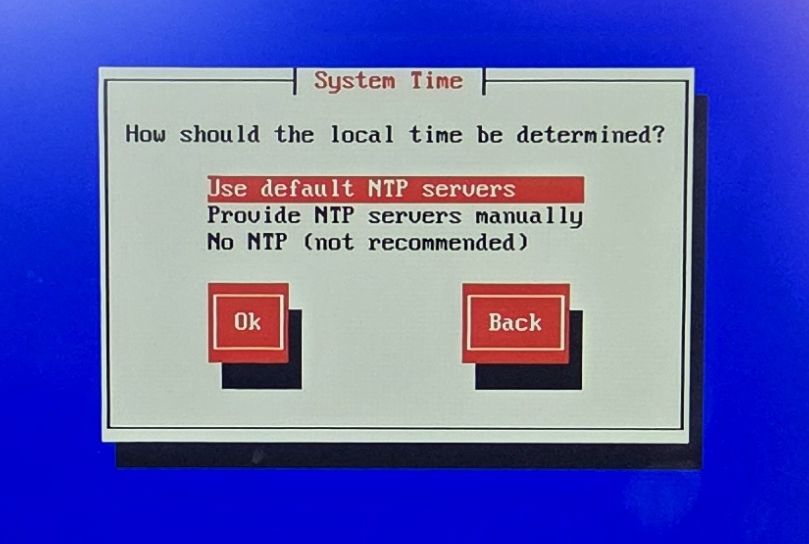
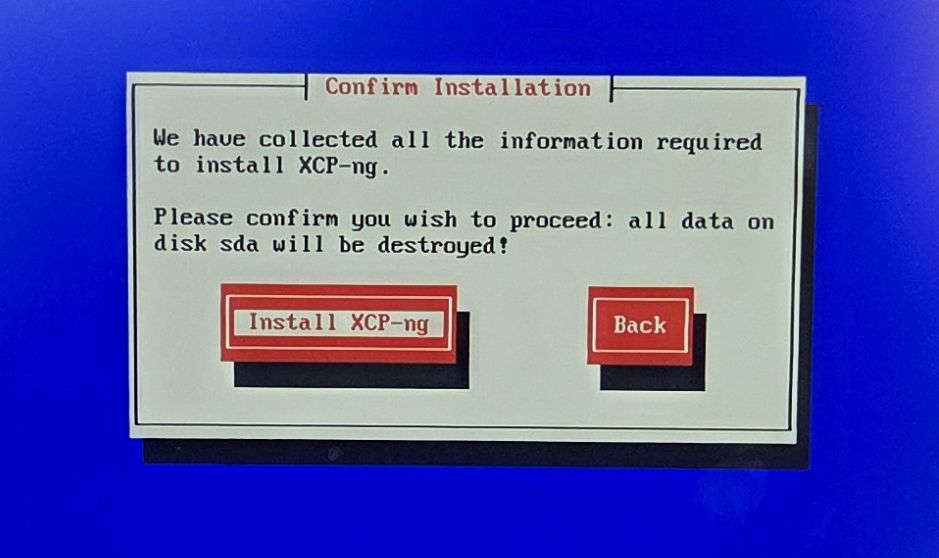
Finish, remove the installation media, and reboot. Note the management address shown on the host console.
2 · Open XO Lite
Open https://<your-host-ip> in your browser. The host initially uses a self-signed certificate: confirm you are connecting to your own host before accepting it. Sign in as root with the password set during installation.
XO Lite is already served by the host; there is no separate XO Lite VM to install.
3 · Deploy XOA
Click Deploy XOA in XO Lite and choose XOA-hl. Fill in the network and deployment fields shown by the form, review the selected image and credentials, and start deployment. Wait for the appliance VM to start and obtain its address. Change any supplied default passwords on first login.
The host’s xoa-proxy streams the selected XVA image into XAPI, which creates the appliance VM. The XOA-hl image is resolved at deployment time, independently of the ISO version.
4 · Connect XO to your host
Open the XOA-hl appliance’s address in your browser. In Xen Orchestra, use Settings → Servers → Add server, enter the host address and its root credentials, and confirm the connection. The appliance has its own address; it is different from the host’s XO Lite address.
Once connected, check the host and storage in Xen Orchestra, upload an installation ISO to the ISO library, and create your first VM.
5 · Keep it up to date
Host updates and appliance updates are separate operations. Use the host’s Patches tab for XCP-hl and Settings → XOA-HL Updates for XOA-hl. Read the Updates guide before starting either operation.
Architecture at a glance
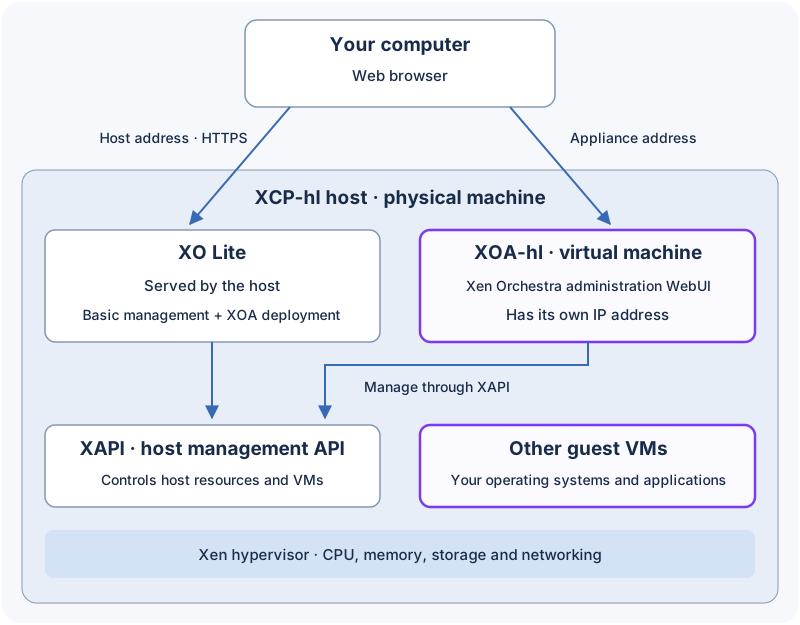
Your browser can connect directly to XO Lite on the host, or to Xen Orchestra inside the XOA-hl VM. XOA-hl then manages the host through XAPI. Other guest VMs run alongside XOA-hl; they do not run inside it.
License
XCP-hl is released under AGPL-3.0 and builds on XCP-ng and Xen Orchestra. It is an independent community project, not affiliated with, endorsed by or supported by Vates SAS or the XCP-ng project.